A predictable lesson structure helps students and saves the teacher planning time. This is the structure every WeLearn smart lesson board follows. Adjust the minutes to your timetable.
The plan at a glance
| Minutes | Stage | What happens on the screen |
|---|---|---|
| 0–5 | Warm-up | Learning objectives and one question that links to last lesson |
| 5–15 | Key notes | The main idea, key terms and any formula, one frame at a time |
| 15–25 | Explore | A live virtual lab or short video; students predict, then observe |
| 25–35 | Guided practice | A worked example together, then one for pairs |
| 35–40 | Game or flashcards | Quick-fire revision of the key terms |
| 40–45 | Exit ticket | Two or three questions answered individually |
1. Warm-up (5 minutes)
Show the learning objectives in student language: "By the end of this lesson I can…". Then ask one question that connects to the previous lesson. Use a visible timer.
2. Key notes (10 minutes)
Present the core idea in short frames. Read the key terms aloud and write the formula on the board. Students copy only what is essential — the full notes are available to them afterwards.
3. Explore (10 minutes)
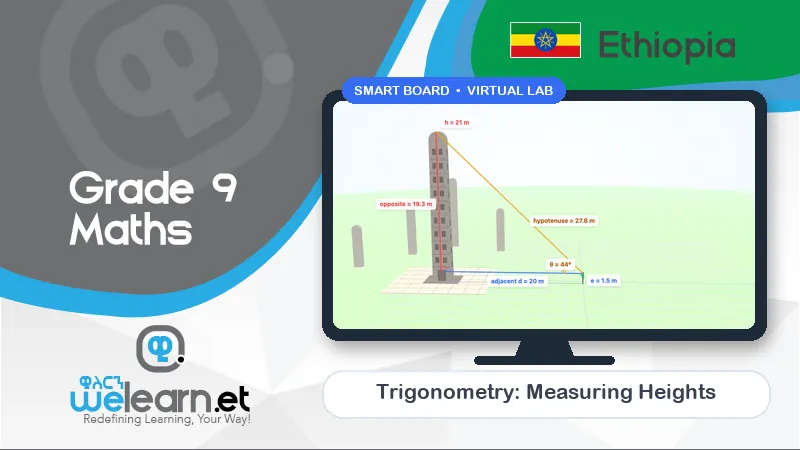
This is the "see it" moment. For the Grade 9 trigonometry unit, for example, students use the Aksum stele lab to measure a height they could never reach with a tape measure. Ask for predictions before every change.
4. Guided practice (10 minutes)
Solve one example together on the board, thinking aloud. Then give pairs a similar problem. Walk the room; invite one pair to present their solution on the screen.
5. Game or flashcards (5 minutes)
A short two-team game or a round of flashcards on the key terms keeps energy up at the end of the lesson and doubles as revision.
6. Exit ticket (5 minutes)
Two or three questions answered individually on paper. Sort the tickets into "got it", "nearly" and "not yet" — that tells you how to start the next lesson.
After the lesson
Show the lesson's QR code so students can open the notes and practice questions at home. For homework, set the unit quiz when you finish the unit.
Tip: you don't have to build each board from scratch. Start from a ready-made board for the lesson and add your own examples.